These articles and tips are designed to help you navigate the various resources on our website.
Click on a blue bar to view the article. Articles can be filtered by category for easier searching. Click on the bar again to close the article window.
Filter by Category:
Search:
For:
Listings Per Page:
of 1
Listings: 1 to 36 of 36
A practical guide to joining NBGS online with Cheque Mail-in or Interac e-transfer*. Click here to access.
* Canadian members only.
[Located in Category: Membership]
A guide to joining NBGS online with a credit card or PayPal. Click here to access.
[Located in Category: Membership]
How do I reset my User Name or Password?
[Located in Category: Website Issues]
When I login to the website and try to access a members-only page the site tells me I need to login again. Why?
This has been an issue since we had a server upgrade. The issue stems from people using an old bookmarked link to access our site. Our new website has more security, and you just need to update your bookmark.
To see which version you are using, copy the link from your bookmark list and paste it into a word processing program like Word or Notepad. The new version starts with HTTPS. If you do not see the S, then you are using the old link.
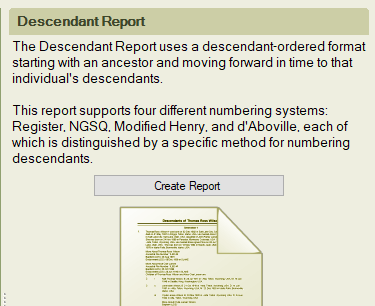
Members may submit descendant reports, in “register” format, for any New Brunswick family. Most genealogical software will produce such reports with little effort. These guidelines are general in nature. Specific instructions for RootsMagic and Family Tree Maker are provided in other articles.
Number of generations - Include at least 3 generations in your report. You might want to start at the oldest ancestor for whom you have solid documentation and end at the generation that includes your great-grandparents, or, possibly, your grandparents.
Privacy - Exclude living persons from your report. In addition, exclude details about any person born in the last 95 years. Likewise, details about burials and marriages within the last 50 years must be excluded.
Font - We suggest that you use a font like Arial or Verdana, with a font size of 12.
Title page - Show the name of the ancestor and his/her date range and give some indications of locations. Include the submitter's name and the date the report was published.
Introduction - If possible, include an introduction that outlines your approach to genealogical research and your reasons for submitting the report. You could also set out any disclaimers and talk about the reliability of the information in the report.
Sources - You should cite your sources - any information without a source is little more than hearsay. We prefer that sources be shown as endnotes, rather than footnotes, if your software will allow that approach.
Index - It is very important to include an index, which should be in the following format:
Surname, Given Names…………...page
Submitter details - Include your name and, if possible, your contact information.
How to create a Register Report using Family Tree Maker - See Submission Guidelines for more information.
Open FTM (Family Tree Maker) and click on ‘People’.
This is an appropriate place to select the ancestor who will be the starting point for your report. Navigate through your tree to find that ancestor, and you should now see something like this on the right side of your screen.
You will have other opportunities to select the starting ancestor but, assuming you have it right, you should now click on ‘Publish’.
At the next screen, click on ‘Genealogy Reports’ and then click on ‘Descendant Report’
The right side of the screen should display something like this:
Click on ‘Create Report’ and FTM will produce and display the first draft of your report.
The right side of the screen should look like this:
You should now start setting the parameters for your descendant report, since the default parameters are unlikely to be entirely appropriate.
Report Title: The title is editable. You may wish to add some identifying information, such as the years of birth and death.
Background: You have the option of using an image as background for your report, but we suggest you leave the setting at ‘None’.
Generations: You should consider several factors when setting this number. Your report must not include any living persons, so the number of generations should be low enough to exclude you and, possibly, your parents and grandparents. You may have to experiment with the number of generations to find the right cut-off point. Additionally, look at the size of the report. Anything more than a couple of hundred pages might be too much.
Generation indicators: There are a few options, but we suggest you stick with ‘Simple’.
Numbering system: It’s important that this be set to ‘Register’.
Pictures: It is probably best that you not include any pictures due to concerns about the size of the report and the storage space that it would require.
List non-vital facts separately: Your choice, we have no recommendation.
Include parent/child relationship types: Your choice, we have no recommendation.
Show generation divider line: Please tick this box.
Include preparer information: Your choice. If you tick this box, the software will pick up the information that you entered in Tools/User Information. If you have not entered your details in that area, then the preparer information will be blank.
There are lots of other options available to fine-tune the content of your report.
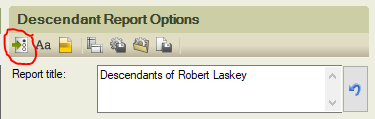
Click on the icon at the left just under the word ‘Descendant’ and you should see this:
The easiest approach is to simply accept the default options, but you will have to decide whether you want to include private facts and private notes.
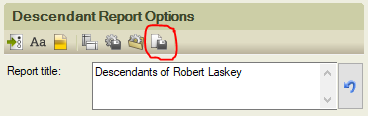
Once you’re happy with the appearance and size of your report, you should save it by clicking on the right-most icon under the word ‘Options’.
The next step in the process is to incorporate your Descendant Report into a ‘Book’, as FTM calls it. In the upper-left corner of the screen, click on ‘Collection’.
You should now see a list of reports and books, like this:
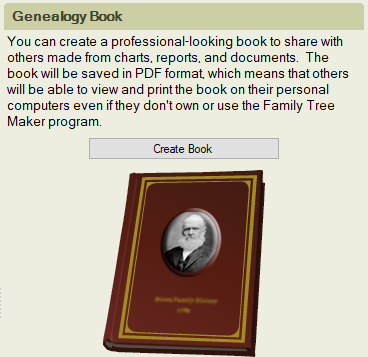
Click on ‘Books’ and you’ll see this in the middle of the screen:
Select ‘Genealogy Book’ and you’ll see this:
Now, click on ‘Create Book’ and then assign a title as shown:
Enter the title you’ve chosen and then press ‘Save’. Don’t forget to save your work frequently as you build your book.
You should now start adding the other items that will ultimately form your book. We suggest that you include:
* Title Page (compulsory - already added above)
* Table of Contents (optional)
* Introduction (optional)
* Descendant Report (compulsory)
* Index (strongly recommended)
To add any of these items, click on the large, blue plus sign at the top of the left-hand column. The up and down arrows will allow you to change the order of items within your book.
To add the Descendant Report that you have already prepared and saved, click on the plus sign, and at the next screen click on ‘Saved Reports’.
Highlight the report you want to insert and then click ‘OK’.
Now it’s time to include an index. Go to ‘Other’, highlight ‘Index’ and click ‘OK’.
The index is generated by the software, but the process might take a couple of minutes - be patient.
After adding the index make sure that the font used in the index is consistent with the rest of the book.
You’re now quite close to the finish line, and this is a good point to critically review all aspects of your book.
Click on ‘Preview Book’ at the bottom of the menu column and, after waiting patiently for a couple of minutes, start scrolling through the book.
* Have you included everything you want in your book?
* Are things in the right order?
* Are the section titles appropriate?
* Do you have the right starting person?
* Did you include the correct number of generations?
* Have all references to living persons been eliminated?
* Did you list your sources?
* Are there any places where you would like to include more narrative?
* Have you used the same font in all sections?
* Is the type size consistent throughout the book?
Of course, you have been saving your work as you went along, but you should re-save the book now.
Finally, you should export your book as a PDF file. To do that, click on share in the upper-right corner.
You will be presented with a number of options; select ‘Export to PDF’.
Now, you should send your PDF file to NBGS. You should anticipate that you will be asked to make some changes. Thankfully, the difficult work is already done and the adjustments requested by NBGS should be tiny.
[Located in Category: Ancestral Lines]
How to create a Register Report using RootsMagic 8 - See Submission Guidelines for more information.
Follow the prompts to Save the file.
You can now exit RootsMagic and open the file in Microsoft Word for editing.
Using Microsoft Word:
Use the Insert feature to add a cover page and/or a blank page which you can edit with the title, your name and other descriptive information. Several pre-styled cover pages are available. Page number, headers and the date are preformatted for you.
Scroll to the bottom of your Word document and, depending of the version, Word can create the index. If you see the Comments as seen below, press the F9 key to have Word create the index for you. The same can be done for a list of place names if you want to add those (on the page following the index).
Notes:
The Word file can be opened with Google Docs, but the 'create index' feature (F9) does not appear to function.
Open Office and other word processing software may open the file, but you will need to experiment with those.
[Located in Category: Ancestral Lines]
How to create a Register Report using Legacy - See Submission Guidelines for more information.
Note: If you wish to include an introduction in your Legacy register report, you will need some additional guidance, which you can find in the next Knowledge Base article. Please contact the Co-Webmanagers.for further assistance.
Open Legacy and select Reports on the Ribbon bar, then click on Descendant Book.
The next screen should look like this =>
This is the control centre - the place to set the parameters for your report.
Options Tab - You should probably start by picking the person who will be the starting point for your report.
At the bottom of the screen, click on 'Change'.
Next, decide how many generations to include in the report. You could set the number to include your great-grandparents, or, possibly, your grandparents, if all persons in that generation are no longer living.
We request that you include a table of contents, with settings as shown.
There are other settings under the Options tab that you may set as you wish.
Missing Information Space - Inserts an underlined space so that missing information can later be filled in for given names, surnames, dates and places.
Single-space children - By default,there is a blank line between subsequent children. Choosing this option removes that extra blank line and packs the child list a bit tighter.
Include Gender for Children - The original format for Register-type reports did not include the gender of the children.
Main Entries - Normally, only individuals who have children are given their own main block of information. Otherwise, they are just listed as children of their parents. You can also specify that individuals with either children or spouses be listed in a main information block, or that all individuals have a main entry. You can also decide to include the direct line back to the starting ancestor and to show the spouses for children who will have a main entry.
Page Layout Tab - The easy (and probably the best) approach is to simply accept the default options, as shown.
Here's a brief explanation of each option.
New Generation On Each Page - Starts each generation on a new page. If you want each generation to begin on an odd numbered page, choose the Start on an odd page number option. Bear in mind that the odd-page-number option will result in a longer book.
Print Names in Bold - Prints each name appearing in the report in a bold font.
Paragraph Indents - The distance to indent each type of paragraph included in the report.
Custom Report Spacing - Lets you adjust the amount of blank line space to be included above the various report sections.
Heading Layout Tab - A couple of the settings in this area are fairly important and we offer some suggestions for your consideration.
Title for Page 1 - The title that is printed only at the top of the first page of the report, after the title page. We suggest that you set this to be as close to the title on the front cover as space will allow. You can also embed replaceable fields within the title text. For example, "Report for [name]". The [name] field will be replaced with the person's name when the report is generated.
Headings - The title that is printed at the top of all the pages after the first page. You could make this the same as the first page or use a shorter title. Here, too, you can embed replaceable fields within the title text. For example, "Report for [name]". The [name] field will be replaced with the person's name when the report is generated.
Subtitles - Specifies the type of generation subtitles printed. These can include the generation number (Generation One, Generation Two) or the Relationship of the generation (Parents, Grandparents) or both (Generation Two, Parents). We suggest that you include both You can also specify the position of the subtitles as being left- or center-justified.
Wording 1 Tab - You can specify phrases that the software will use when creating the narrative paragraphs of the report. We suggest that you simply accept the default wordings, as shown.
Wording 2 Tab - You can specify phrases for the various note paragraphs of the report. These include General Notes, Research Notes, Medical Notes, Marriage Notes, Birth Notes, Christening Notes, Death Notes, and Burial Notes. For simplicity, we suggest that you accept the default wordings.
Index Options - An all-names index is, from our perspective, a vital component of your book. It is important that you follow our suggestions for the settings.
Start by clicking on Index Options, near the bottom of the main page.
Please use the settings as shown in the example to the right.
* Include a name index
* Use Style 2
* Surnames should be uppercase
* Use two columns
We would prefer that you not include a Location Index.
Title Page - We recommend that you include a title page for your report.
Start by clicking the appropriate box near the bottom of the main page.
Main Title - The title on the Title Page. There are 4 blank lines for inputting your title, so you can be quite descriptive. Please set the font to Arial and the size to 18.
Subtitle - The subtitle that prints at the bottom of the Title Page. This area could include your name. Please set the font to Arial and the size to 14.
Picture - You can include a specific picture on the Title Page.
Caption - The caption you want to print under the picture.
Size - The picture can be printed small, medium or large.
Shadow-You can have a drop-shadow behind the picture.
Report Options - This section contains many options that allow you to change the appearance of your report.
After clicking Report Options you will be presented with a number of tabs.
Include - The default options, as shown to the right, are generally appropriate. We strongly recommend that you not include any addresses in the report.
Format - Here, again, the default options are largely appropriate. That said, there are a few things we'd like to highlight.
You should click the box for "Don't repeat duplicate lines".
Under Page Numbering, click the box for "Number all pages consecutively".
Under Blank Line Removal, click the box for "Keep Bir., Chr., Dth., Bur. and Marr."
Under Event Addresses, do not click any boxes.
Notes/Stories - The default options, as shown at right, are appropriate for notes.
You should only include stories if they will not take up a huge amount of space. Depending on the ultimate size of your book, limiting stories so they take no more than 10% to 15% of the total space might make sense.
Sources - Every researcher judges the work of others by looking at the quantity and quality of sources that have been cited. If you want others to accept your work, you need to cite your sources.
Click the box that says "Print sources citations'
Click the button that says, "As endnotes at the end of the book"
Click the button that says, "Indent first line"
Pictures - For the purposes of the NBGS website, we suggest that you not include any pictures. If a few pictures are critical to your narrative, be sure to tightly control the number.
Report Settings - This is located in the lower right corner of the main page.
Save - Saves the current set of report options for either future use (saved under a file name you provide) or as user-default settings.
Load - Load a set of saved options (you choose from any settings you have previously saved) or load User-Defaults.
Reset - Change all the report options back to either the Legacy defaults or to your user-defaults (if you have saved user-default settings).
Printing - When you have set all the options, click either the Preview button to see an on-screen view of the report before it is actually printed, or click Print to have the report sent directly to the printer.
Descendant Charts can be output to various formats. Make your choice by clicking on the appropriate option button in the lower right corner of the Report Menu window. The choices are:
Screen / Printer Sends the report to either the Print Preview window or directly to your printer, depending on whether you click the Preview or Print button.
Rich Text File Sends the report to a disk file containing all the formatting options such as bolding, indents, fonts and font sizes. It also contains all the index and table of contents marks. This file can then be loaded into your favourite word processor for further editing and formatting.
Text File Sends the report to a text file on either your hard drive or a floppy disk. You will be prompted for a drive and folder. (Note: The Index, Table of Contents, and Title Page options are not available when using the Text File output format.)
HTML File Sends the report to an HTML file that can be used on a website or sent as an e-mail message. You will be prompted for a drive and folder. (Note: The Index, Table of Contents, and Title Page options are not available when using the HTML File output format.)
PDF File - Generates the report, displays it in the Print Preview window and then creates an Adobe PDF (Portable Document File) file. This file can be viewed with the free Adobe Acrobat Reader and easily sent to other people by e-mail.
[Located in Category: Ancestral Lines]
How to add an introduction to a Legacy Register Report -
Many contributors to Ancestral Lines provide introductions to their descendant reports to outline their approaches to genealogy or to highlight things in their reports. The standard version of Legacy does not make it easy to include an introduction although the deluxe version offers the feature. These instructions are for the standard version.
There are a number of steps that you will need to take to add an introduction and the order is important.
1. Save your Legacy descendant report as an RTF file
2. Open the RTF file in your word processor. (We used MS Word but other word processors should work the same way.)
3. Make a back-up copy of the RTF file so you can start over again if something goes wrong.
4. Navigate through your document to the point where you wish to insert your introduction (We suggest that the introduction be added immediately after the Table of Contents.)
5. Insert a new section break (in Word go to Page Layout and then click on Breaks. You should see something like this:
6. Select Next Page
7. Add a header. Use the same ‘style’ as the other headers in the document. (Your word processor looks for a particular style to create the Table of Contents.
8. Edit the footer for the page number. You need to re-set the pagination so that numbering starts with your intro and is continuous to the end of the document.
9. Type in the text of your introduction.
10. Save your file.
11. Navigate to the Table of Contents page. It should look something like this:
12. If you’re using Word, click on ‘REFERENCES’ in the menu ribbon and then click on Table of Contents. (Other word processors may have different approaches and different labels so consult the user manual)
13. Word and other word processors offer multiple formats. Pick the one that suits you best.
14. Save your file.
15. Navigate to the Index page, which should be at the end of the document and will look something like this:
16. If you’re using Word, click on ‘REFERENCES’ in the menu ribbon and then click on Insert Index.
17. Your word processor should offer you some choices, like this:
You should select 2 columns in order to save space.
Click on ‘Right align page numbers’
18. When you’re satisfied with the settings, press OK at the bottom of the dialogue box. Don’t forget that you can undo the creation of the index if you’re not happy with the result and then try again.
19. Save your file.
20. You should now convert the finished document to PDF and send it to NBGS.
[Located in Category: Ancestral Lines]
ANCESTRAL LINES
A few years ago, Capital Branch of the New Brunswick Genealogical Society launched a project to promote the sharing of genealogical research by NBGS members. Members were invited to submit descendant reports, in “register” format, for a few generations of any New Brunswick family.
A descendant report, in register format, uses the genealogical numbering system developed by the New England Historical and Genealogical Society and starts with a particular ancestor, who is given the Arabic number 1. Each child of this ancestor is then numbered in birth order with a lower-case Roman numeral (i, ii, iii, iv, etc.). If the birth order is not definitively known, children are listed in the most likely order. Any of these children who have descendants included in the report are also assigned an Arabic number (2, 3, 4, etc.) and they appear later in the report with their children listed as descendants. Children who do not have descendants listed in the report are only assigned a lower-case Roman numeral. Only the primary ancestor (number 1 in the report) and the primary ancestor’s descendants are assigned numbers. Non-descendants of the primary ancestor, such as spouses and partners, are not assigned numbers.
[Located in Category: Ancestral Lines]
Anglican Registers - How to Login
For Guest accounts, your User ID is your email address. For NBGS members, your User ID will be assigned to you.
[Located in Category: Anglican Registers]
Note to new members: Setting up your access to ARP is a manual process done by volunteers and may take a week or so to complete.
Common login issues:
Member accounts - Use the login name and password sent to you by NBGS.
Guest accounts - Use the email address you used to register for your account.
To reset your password: Use the email address you used to register for your account.
To find out more about this projectand how to use it, go to the Knowledge Base or view an instructional slideshow.
If you find an error, report it using our Support page.
[Located in Category: Anglican Registers]
Anglica Registers - Forgot My Password
Make sure to use the email address that is on file with your NBGS account when re-setting your password.
What email address did I use to register?
NBGS members can login to NBGS, click on then Member Login of the left sidebar. Under that is your Profile. Click Profile, then Contact Info to see the password associated with your account.
Forguest accounts, please email webmanager@nbgs.ca to confirm the email address used to set up the account.
[Located in Category: Anglican Registers]
Anglican Registers - Search by Name.
[Located in Category: Anglican Registers]
Anglican Registers - Register Search
[Located in Category: Anglican Registers]
Anglican Registers - Full Text Search
[Located in Category: Anglican Registers]
Notes about the Search Facility
The full-featured search facility is available to all members.
The basic search facility for non-members is also available. Non-members must create a 'guest' account, using a valid email address.
The search facility fully implements the privacy rules used by the Provincial Archives of New Brunswick. At their request, adoption information has been redacted from the images.
[Located in Category: Anglican Registers]
Anglican Registers - Privacy Constraints
The search facility fully implements the privacy rules used by the Provincial Archives of New Brunswick. At their request, adoption information has been redacted from the images.
[Located in Category: Anglican Registers]
Anglican Registers Project - Background and Status
Project Background
The Anglican Church has had a presence in New Brunswick since 1768 when the Rev. John Eagleson was sent by the Society for the Propagation of the Gospel in Foreign Parts to minister to the people living in the Tantramar area of present-day New Brunswick. Many more priests arrived in 1783 along with the United Empire Loyalists and as they established new congregations they started recording many of the events of church life - baptisms, confirmations, marriages, burials and others. Beginning in the 1960s the Anglican Diocese of Fredericton attempted to gather and preserve these records and, while the process is not complete, there are now 755 registers of various types being held by the Diocesan Archives. (You can read more about the history of the Diocesan Archives by clicking here.)
In May 2018 the New Brunswick Genealogical Society and the Provincial Archives of New Brunswick, which now manages the Anglican records on behalf of the Diocesan Archives, agreed to scan and transcribe the many registers and then to make them available to the public on the NBGS website. Recruitment of a technical team and a large group of transcribers started in August 2018 and, following a pilot phase, the transcription project got under way in January 2019.
Many of the registers are very fragile and require delicate handling. Scanning these registers and then enhancing the images takes a lot of human resources and some expensive equipment. Fortunately, advances in technology - both hardware and software - have made it possible to enhance the scanned images and eliminate many of the problems that make the physical registers difficult to read.
Project Status
Most of the registers held by the Diocesan Archives of the Anglican Diocese of Fredericton have been transcribed. However, registers continue to trickle in to the Archives and will be earmarked for scanning as they arrive. Additionally, we are aware of registers that have been microfilmed in the past but have not been deposited
As data is transcribed and cleaned, it is being moved from the transcription database to the ARP database. This means that new data is regularly being added to this site.
The on-line maps show locations of cemeteries with links to websites (such as Find A Grave), photos, descriptions or other information. Some descriptions may include GPS coordinates, conditions at the cemetery regarding access to the site (gates, deeply wooded terrain, private property, military base restrictions, etc) or whether the cemetery no longer exists (reclaimed by nature, flooded by hydro electric projects, or washed away in storms). Not all cemeteries include descriptions.
These maps are arranged by County. Select a county, then scroll in and click on a map pointer to see details about the cemetery. The maps were created using Google Maps. You may need to sign in to your Google account to access the maps.
Cemeteries that have been precisely located are shown in blue.
Cemeteries whose locations are approximate are shown in orange.
We need your help to identify the cemeteries shown in purple.
If you have updates or corrections; can help us find lost cemeteries; or to submit photos, go to Support.
See step-by-step instructions:
[Located in Category: Cemeteries]
[Located in Category: Cemeteries]
Do you have a family bible register you'd like to share with the members of NBGS? Qualifying registers would have birth dates prior to 1929 and marriage and death dates prior to 1974 (we can redact few dates for you if necessary), and at least some of the family must have lived in New Brunswick during the time frame of the register. We need your register scanned or photographed in either JPEG or PDF format (JPEG prefered). We’d like you to include a brief explanation about the family in the register and/or a transcription of the names and dates. You can send your register to queries@nbgs.ca
[Located in Category: Family Registers]
The SURNAME INDEX shows the names of each person mentioned in the profiles. There are profiles only for the names listed in UPPERCASE letters.
In this example, John and William ABERNATHY are the subjects of Family Profiles. Mary Ann Abernathy is mentioned in the Family Profile for Lewis HOLMES. Sarah is in the profile for Robert WARD.
Abernathy, Grace See ABERNATHY, John ABERNATHY, John
Abernathy, Mary Ann See HOLMES, Lewis
Abernathy, Sarah See WARD, Robert
ABERNATHY, William
SEARCH STRATEGY: Locate your target in the Surname Index; then go to Family Profiles.
[Located in Category: First Families]
BACKGROUND: Since it was established in 1967, the Provincial Archives of New Brunswick has received a large number of family histories donated with the intention of preserving them and making them available to current and future researchers. To help researchers, the staff at the Provincial Archives had produced a Guide to family histories at the Provincial Archives. Although an excellent resource, it is not particularly detailed.
In 1997 members of the New Brunswick Genealogical Society, Inc. decided that a more detailed listing of genealogical resources at the Provincial Archives of New Brunswick was required. A Society member, Robert F. Fellows, was asked to undertake this project. The first "partial listing" was produced in 1999 and distributed, along with various other genealogical resources, to libraries throughout the province. The current (6th) edition, released in January 2006, has been prepared to assist the family historian identify and locate genealogical data in the files, books, manuscripts, records and resources found in the collections at the Provincial Archives of New Brunswick located in Fredericton, New Brunswick.
ABOUT FIRST FAMILIES: Completed in 2006 to help family historians locate genealogical data in the Manuscript Collection at the Provincial Archives of New Brunswick (PANB). Each Family Profile contains a source citation to locate the material at PANB. The data in each Family Profile is only for the first family of that surname to arrive in New Brunswick. Acadians, Pre-Loyalists and Loyalists, who arrived in the province with older children who immediately married and began having children, may have two generations of their family described.
ABOUT THE PROFILES: This compilation contains information on 7,414 of the first families to arrive in New Brunswick. Each descriptive family entry (i.e. Family Profile) contains the name of the head of a household, date and place of birth, the date of death, the parent names and the name of the community, parish and county where the family settled. Next is listed the date and place of marriage, the name of his wife, the date and place of her birth, the date of her death and the names of her parents. The names of each of the children, their dates of birth and death, the names of their spouces, their dates of birth and death and names of their parents are listed. The Family Profile concludes with a description of the record source or sources at the Provincial Archives of New Brunswick in which information was found. The name of the file, the book, manuscript or collection as well as the number of pages within the source or sources are provided to enable the researcher to visit the Provincial Archives and locate this material quickly and efficiently.
Researchers should remember that the data in each Family Profile is only for the first family of that surname to arrive in New Brunswick. Information on the family before coming to New Brunswick, and for succeeding generations sometimes up to the present, may be available in the file, book or collection. The genealogist will have to visit the Provincial Archives and check the resources out for themselves. Acadians, Pre-Loyalists and Loyalists, who arrived in the province with older children who immediately married and began having children, may have two generations of their family described.
[Located in Category: First Families]
COPYRIGHT: The material in First Families is owned by the New Brunswick Genealogical Society Inc. (NBGS) and may not be displayed or reproduced in any way, in whole or in part, without the consent of NBGS. You may use the information contained in First Families to document your personal research as long as credit is given to NBGS.
DISCLAIMER: The Family Profiles are often inaccurate and should be used as a finding aid only. The information has not been updated since 2006. Many of the files reference "Arrivals 99: Our First Families in New Brunswick", which is out of print and does not contain any source citations. All the material from Arrivals 99 is already in the First Families files.
[Located in Category: First Families]
Contributor Guidelines
Generations is published quarterly in Fredericton, NB, by the New Brunswick Genealogical Society, and is distributed to all its members in Canada, the United States and overseas. The Society also publishes books related to genealogy and sponsors periodic seminars.
Generations is made up almost entirely of articles contributed by members, and the society encourages submissions that deal with genealogy and family history.
Articles submitted for publication are to be sent by e-mail attachment to editor@nbgs.ca
Contributors are responsible for obtaining permission to publish material owned by others.
The editor of Generations reserves the right to edit all contributions for form, grammar and to shorten articles to fit available space. Excepted are articles reprinted with permission from other publications. Articles that are edited will be returned to the contributor for approval.
Generations goes to the printer February 15th, May 15th, August 15th and November 15th. Items for publication must reach the editor at least 7 days earlier.
The New Brunswick Genealogical Society does not guarantee the accuracy or completeness of articles, data, book reviews, notices, advertisements, or source material and services, or any material printed in Generations. Errors, and opinions expressed, are solely the responsibility of contributors.
Articles, letters to the Editor and other correspondence may also be printed and sent by mail to:
Generations Editor,
N.B. Genealogical Society
P.O. Box 3235, Station B
Fredericton, NB E3A 5G9
[Located in Category: Generations]
See our Quick Guide to Endnotes as published in Generations Spring 2022.
Editor’s note: The Query number contains the two-digit year of publication (Q21-xxxx). At the end of each query, the date it was received is noted. To protect your privacy, published contact information will be limited to name and e-mail address. If you require a postal address to respond to a query, please contact the editor.
Dates violating Provincial privacy guidelines will be redacted (births 95 years; marriages and deaths 50 years)
Queries submitted by mail should be addressed to:
Queries Editor
NBGS Inc.
PO Box 3235, Stn. B
Fredericton, NB E3A 5G9
Canada
Or post directly to our social media platforms.
How to reply to a Query
Send an email to the person who posted the query and a copy to the queries editor.
Please quote the Q-number in your response.
[Located in Category: Queries]
To add or edit your list of Surnames, go to your Profile under Member Login. Once there, select the tab marked Surnames.
To add a surname, click on the small + sign on the right side of the screen.
To edit a surname, click on the pencil icon beside the name on your list.
To delete a surname, click on the trash can icon beside the name on your list.
Surname research is a great way for members to connect and share their research interests.
To add or edit your list of surnames:
To add a surname: After clicking the + sign, fill in the form and click SAVE. The only required information is the surname. You can more details if you wish to.
[Located in Category: Membership]
To change your password, go into your profile and click on the tab Member Settings. Then click the pencil icon to open the editing screen.
Fill in your new password, then click Save.
[Located in Category: Membership]
If you joined NBGS before 1 Jan 2023, your expiry date is 31 Dec.
To check your account expiry date, go into your profile. The date is on the right of the screen.
[Located in Category: Membership]
Have you moved? Do you have a new e-mail address? A new phone number? To edit your contact information, go to your Profile and select the tab Contact Info. Click the pencil icon and make your changes. Click SAVE when you are done.
[Located in Category: Membership]
How to write an effective query
We all run into brick walls with our research and may want to ask for help from others. Whether you decide to send a query to NBGS for publication, post one on our Facebook page or engage the services of a professional researcher, here are some suggestions to make your initial query more effective.
A common mistake is to submit something that is too vague. For example,
“I’m looking for information on my great grandfather, John Smith.”
Whoever reads this query does not have any information with which to proceed. The submitter has some knowledge as to when John lived, where he may have lived, and who some of his family members might be, but the person reading the query does not. This query does not specify if John was born in 1820 or in 1920, if he lived in Miramichi or St Stephen, or anything else about him. There is no information to use to start a search. Plus, no specific question was asked. Anyone trying to help needs to have some idea of what you’d like to know.
Create a more effective version of the same query by adding a few specific details:
“I’m looking for death and burial information for my great grandfather, John Smith, who died before the 1871 census, and lived in XYZ town, NB.”
In this example, you have a specific question “looking for death and burial Information” plus an approximate date “died before the 1871 census” and a location “XYZ town, NB”. Anyone helping you can now focus on the location, date and type of record you seek, and they know you already looked at the 1871 census.
Adding even more detail can help, but adding too much does not.
“I’m looking for death and burial information for my great grandfather, John Smith, who shows up in the 1861 census in XYZ town, NB, with his wife Betsey and their four children, Mary, Robert, Fred and Sarah. In the 1871 census, Betsey, now a widow, and the children still live in XYZ town.”
In this third example you have added the names of the wife and children and the last date John was known to be alive. Now the focus can be in a specific time range (1861 to 1871) and a few names to help confirm the identity of John if documents are found. Betsey might be the informant on the death certificate. Do the names of the children add any value to this search? They may not be necessary, but might also be useful. However, adding details such as Betsey was born in Ireland or the names of her parents would probably not be useful to help find John’s death or burial information.
These three examples show how adding a bit of detail can assist those who wish to help. However, adding too much detail may not be helpful. You don’t need to include the full family history.
If you are hiring a researcher, the researcher will ask for more details once they have agreed to explore your project. For the initial query, keep it simple.
[Located in Category: Queries]
Note to new members: Setting up your access to ARP is a manual process done by volunteers and may take a week or so to complete.
Common login issues:
Member accounts - Use the login name and password sent to you by NBGS.
Guest accounts - Use the email address you used to register for your account.
To reset your password: Use the email address you used to register for your account.
To find out more about this projectand how to use it, go to the Knowledge Base or view an instructional slideshow.
If you find an error, report it using our Support page.
[Located in Category: Website Issues]
The Miramichi Branch maintains its own website. For new members joining the Miramichi branch, you will have immediate access to the main NBGS website, but creating login credentials for the Miramichi site is a manual process and will take several days. Please be patient.
[Located in Category: Website Issues]
Not getting email from us? Check to make sure your email address is up to date by going into your profile and updating your contact info.


.JPG)
.JPG)
.JPG)


 the starting point for your report.
  Next, decide how many generations to include in the report. You could set the number to include your great-grandparents, or, possibly, your grandparents, if all persons in that generation are no longer living.

 Heading Layout Tab - A couple of the settings in this area are fairly important and we offer some suggestions for your consideration.
 Wording 1 Tab - You can specify phrases that the software will use when creating the narrative paragraphs of the report. We suggest that you simply accept the default wordings, as shown.
 Wording 2 Tab - You can specify phrases for the various note paragraphs of the report. These include General Notes, Research Notes, Medical Notes, Marriage Notes, Birth Notes, Christening Notes, Death Notes, and Burial Notes. For simplicity, we suggest that you accept the default wordings.
 Index Options - An all-names index is, from our perspective, a vital component of your book. It is important that you follow our suggestions for the settings.
 Please use the settings as shown in the example to the right.
 Title Page - We recommend that you include a title page for your report.


 Include - The default options, as shown to the right, are generally appropriate. We strongly recommend that you not include any addresses in the report.
 Notes/Stories - The default options, as shown at right, are appropriate for notes.
 Sources - Every researcher judges the work of others by looking at the quantity and quality of sources that have been cited. If you want others to accept your work, you need to cite your sources.
 Pictures - For the purposes of the NBGS website, we suggest that you not include any pictures. If a few pictures are critical to your narrative, be sure to tightly control the number.
 Printing - When you have set all the options, click either the Preview button to see an on-screen view of the report before it is actually printed, or click Print to have the report sent directly to the printer.
 5. Insert a new section break (in Word go to Page Layout and then click on Breaks. You should see something like this:
 11. Navigate to the Table of Contents page. It should look something like this:
 15. Navigate to the Index page, which should be at the end of the document and will look something like this:
 16. If you’re using Word, click on ‘REFERENCES’ in the menu ribbon and then click on Insert Index.
 17. Your word processor should offer you some choices, like this:


.jpg)


